| We need it frequently to install ISO image file into our Windows operating system. One way is to burn ISO into USB or DVD. But there is another way, we can extract contents from an ISO file into hard drive using third party tools. Below list of some tools: |
| First I will demonstrate how we can extract an ISO file using Pismo File Mount. Download Pismo File Mount from above link. then click on an ISO file will show menu as below: |
 |
| Click on very first option named "Mount" will show a folder with extract files and folders. From there you can find your installation exe file and run to install your desired software. Actually Mounting an ISO file create a virtual drive like below image. You can then Eject that virtual drive by right click on that drive and select "Eject" option from options. |
 |
Showing posts with label windows. Show all posts
Showing posts with label windows. Show all posts
Saturday, September 1, 2018
Extract the contents from an .ISO file without burning the .ISO to disc using third party application
Saturday, September 30, 2017
Nginx Windows: How to Install | How to Install Nginx on Windows
At first you have to download Nginx from Nginx Downloads
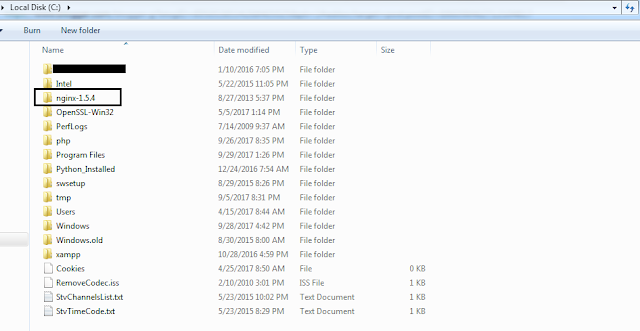
Then extract it to c directory as below screenshot:
Then navigate to "nginx-1.9.9" and execute below command to start nginx server:
nginx.exe
Your server started at port 80 as http://localhost:80

To stop nginx server run below command:
nginx.exe -s stop
To change nginx port navigate to folder "config" folder and edit file "nginx.conf", find the string "listen 80;" and change it to suppose "listen 8200;", stop and start nginx, then browse to http://localhost:8200 as below:

Then extract it to c directory as below screenshot:

Then navigate to "nginx-1.9.9" and execute below command to start nginx server:
nginx.exe
Your server started at port 80 as http://localhost:80

To stop nginx server run below command:
nginx.exe -s stop
To change nginx port navigate to folder "config" folder and edit file "nginx.conf", find the string "listen 80;" and change it to suppose "listen 8200;", stop and start nginx, then browse to http://localhost:8200 as below:

Monday, June 19, 2017
VBScript: Execute Script Using Command Prompt | Execute Script Using Batch File Processing
VBScript: Execute Script Using Command Prompt | Execute Script Using Batch File Processing. It's easy to execute a VBScript file using Windows command prompt. First need to create ".vbs" file. Now create a file named "MyScript.bat" with following code and double click the bat file to execute VBScript.
mode 200,50
cscript.exe MyScript.vbs
pause
exit;
Thursday, May 25, 2017
PHP Script - detect whether running under Linux or Windows?
PHP script - detect whether running under Linux or Windows or other Operating System? I don't have so much knowledge but can overcome with some solution. "PHP_OS" will solve this issue. Below is function to check if OS is Windows or not:
if (strtoupper(substr(PHP_OS, 0, 3)) === 'WIN') {
echo 'Windows!';
} else {
echo 'Other Than Windows!';
}
PHP_OS will output below list of Operating System, not full list but I think it's almost all.
if (strtoupper(substr(PHP_OS, 0, 3)) === 'WIN') {
echo 'Windows!';
} else {
echo 'Other Than Windows!';
}
PHP_OS will output below list of Operating System, not full list but I think it's almost all.
- CYGWIN_NT-5.1
- Darwin
- FreeBSD
- HP-UX
- IRIX64
- Linux
- NetBSD
- OpenBSD
- SunOS
- Unix
- WIN32
- WINNT
- Windows
Monday, May 22, 2017
Install Composer as Portable on Windows
Its sometimes we need Composer in our system but we don't want to install another extra software in our machine. So below is a simple nice script to do it without any hassle. Just you need to create an file named "Composer-installer.bat" with content below in any of your directory and double click on it. It will install composer in your system.
@ECHO OFF
REM Installs Composer as portable

REM Set Home folder as Composer Global Configuration Folder
SET COMPOSER_HOME=%~dp0Home
if not exist %COMPOSER_HOME% md "%COMPOSER_HOME%"

REM If PHP Path Not Set Yet
set PATH=%PATH%;c:\xampp\php

REM Download Composer
php -r "readfile('https://getcomposer.org/installer');" | php

SET COMPOSER_BAT=%~dp0composer.bat
if not exist "%COMPOSER_BAT" (
 echo @ECHO OFF> "%COMPOSER_BAT%"
 echo SET COMPOSER_HOME=%%~dp0Home>> "%COMPOSER_BAT%"
 echo if not exist %%COMPOSER_HOME%% md "%%COMPOSER_HOME%%">> "%COMPOSER_BAT%"
 echo php "%%~dp0composer.phar" %%*>> "%COMPOSER_BAT%"
 echo EXIT /B %%ERRORLEVEL%%>> "%COMPOSER_BAT%"

)
call composer --version | findstr /i /r /c:"Composer......version"

REM Increases Composer Time-out
call composer --quiet config --global process-timeout 3000

REM Set Local folder for Composer Internal Cache
SET COMPOSER_LOCAL=%~dp0Local
if not exist %COMPOSER_LOCAL% md "%COMPOSER_LOCAL%"
call composer --quiet config --global cache-dir "%COMPOSER_LOCAL%"
pause
Friday, May 5, 2017
Create public/private key pair using OAuth RSA-SHA1 method on Windows with OpenSSL
Download OpenSSL from http://slproweb.com/products/Win32OpenSSL.html
And install on your machine.
Or you can download light version from windows 32 bit from here.
Or you can download light version from windows 64 bit from here.
Open Command Prompt as Administrator and navigate to "C:\OpenSSL-Win32\bin". (Assumed that in that location your openssl installed)
Now execute the following three commands:
openssl genrsa -out privatekey.pem 1024
set OPENSSL_CONF=C:/OpenSSL-Win32/bin/openssl.cfg [It may be .cfg or .cnf, check your bin directory]
openssl req -new -x509 -key privatekey.pem -out publickey.cer -days 1825
Below are two screen-shots:


Tuesday, February 7, 2017
Sunday, August 21, 2016
Common tasks to increase internet speed on windows
- Disable auto update your operating system. For windows go to "Control Panel/Windows Update" and turn off auto update.
- Uninstall unnecessary toolbar like Ask Toolbar, iLivid etc.
- Go to "start menu" and type "run" in search box and select "run". Then type "gpedit.msc" in "run" box and type enter. Now go to "Computer Configuration/Administrative Templates/Network". Now double click on "QoS Packet Scheduler". Again double click on "Limit reservable bandwidth". After open the dialog enable "Bandwidth limit" and set value as "0". Restart your computer and start use.
Thursday, September 5, 2013
Install Jboss 5.1.0.GA to Windows 7
Today I am going to show you how to install Jboss 5.1.0.GA on a Windows 7 machine.
1. First of all download the binaries from http://www.jboss.org/jbossas/downloads/
2. The downloaded file is a zip is named jboss-5.1.0.GA-jdk6.zip. As you can see it is a zip archive and not an executable.
3. Create an installation folder (I created one at C:\Program Files\Jboss) and extract the archive there.
4. Add the path to JBoss directory to JBOSS_HOME enviroment variable (picture 1). For me it is C:\Program Files\Jboss\jboss-5.1.0.GA

5. Add the path to JDK directory to JAVA_HOME enviroment variable (picture 1). For me it is C:\Program Files\Java\jdk1.6.0_31
6. Gongratulations! We are ready! Now to start the application server open a shell window using WinKey + R then type cmd and hit Enter.
7. Type
C:\Program Files\Jboss\jboss-5.1.0.GA\bin\run.bat -b 0.0.0.0
Notice the parameter -b! This parameter assures that server isvisible from all computers inside the network.
7. If you want to see if the application server has started correctly, inspect the log output in the shell will it is loading. When the process is finished open a browser and type: http://localhost:8080/web-console/
Thursday, August 22, 2013
Using php execute command/run another php file wihtout waiting for result
<?php
session_start();
$_SESSION["student_name"] = "Pritom Kumar Mondal";
$_SESSION["roll"] = "College: 2150, Varsity: 060238"; echo "Start time: " . date('h:i:s');$phpCommandLocation = "C:\\xampp\\php\\php.exe";$phpFileLocation = "C:\\xampp\\htdocs\\test1\\call.php";$logLocation = "C:\\tmp\\result.log";$argvList = " session_id=".session_id(); /*You can send session id*/ $argvList$command = $phpCommandLocation . " -f " . . $phpFileLocation . $argvList . " 1>>" . $logLocation . " 2>&1 &"; pclose(popen("start /B " . $command, "r"));
echo "<BR>End time: " . date('h:i:s'); ?>
And output is:
Start time: 11:07:26
End time: 11:07:26
And call.php looks like:
<?phpforeach($argv as $argvString) {
$argvStringList = explode("=", $argvString);
if($argvStringList[0] == "session_id") {
session_id($argvStringList[1]);
session_start(); /* Start session with received session id, BINGO... */
}
}
$string = "\r\n-------------------------------\r\nStart time: " . date('h:i:s'); $string .= "\r\nStart sleeping for 5 seconds."; sleep(5); $string .= "\r\nEnd time: " . date('h:i:s'); file_put_contents("data.txt", "SOMETHING WENT GOOD...................\r\n" . $string);
echo $string; echo "\r\nReceived argv list: "; print_r($argv); /* Printing argv as array */echo "\r\nPrevious index.php session variables in currently executed php: "; print_r($_SESSION); /* Printing argv as array */ ?>Yellow background showing that this script wait for 5 seconds.The C:\\tmp\\result.log is:-------------------------------
Start time: 11:07:28
Start sleeping for 5 seconds.End time: 11:07:33Received argv list: Array
(
[0] => C:\xampp\htdocs\test1\call.php
[1] => session_id=gjbf54ql8dhuvg0njsgt4hh8n7
[2] => name=Pritom%20Kumar%20Mondal%2C%20Roll%3D2525
) Previous index.php session variables in currently executed php:Array
(
[student_name] => Pritom Kumar Mondal [roll] => College: 2150, Varsity: 060238
)
There are a few thing that are important here.
First of all: put the full path to the php binary, because this command will run under the apache user, and you will probably not have command alias like php set in that user.
Seccond: Note 2 things at the end of the command string: the '2>&1' and the '&'. The '2>&1' is for redirecting errors to the standard IO. And the most important thing is the '&' at the end of the command string, which tells the terminal not to wait for a response.
Third: Make sure you have 777 permissions on the 'result.log' file
If you use linux operating system just write:
<?php
exec($command . " > /dev/null &");
?>
Wednesday, July 24, 2013
Enable SSL in Apache Server in Windows
Step 1: Installing OpenSSL on Windows
Step 2: Create Self-Signed Certificate Windows
Step 3: Open up

Step 2: Create Self-Signed Certificate Windows
Step 3: Open up
conf\httpd.conf in a text editor and look for the line LoadModule ssl_module modules/mod_ssl.so and remove any pound sign (#) characters preceding it. If you don't see that line where it probably should be (among the other LoadModule lines), then your installation may not have mod_ssl.so ... can't help you there!
Step 4. Also, while you're in
conf\httpd.conf, make sure the following lines exist somewhere: <IfModule mod_ssl.c>
Include conf/ssl.conf
</IfModule>
Step 5. Create a directory under conf called ssl and copy the cp.key (your key file) and cp.cert (your certificate file) files there.
Step 6. Create a file conf\ssl.conf and open in a text editor and paste the following code:
<IfModule ssl_module>
# Pseudo Random Number Generator (PRNG):
# Configure one or more sources to seed the PRNG of the SSL library.
# The seed data should be of good random quality.
# WARNING! On some platforms /dev/random blocks if not enough entropy
# is available. This means you then cannot use the /dev/random device
# because it would lead to very long connection times (as long as
# it requires to make more entropy available). But usually those
# platforms additionally provide a /dev/urandom device which doesn't
# block. So, if available, use this one instead. Read the mod_ssl User
# Manual for more details.

#SSLRandomSeed startup file:/dev/random  512
#SSLRandomSeed startup file:/dev/urandom 512
#SSLRandomSeed connect file:/dev/random  512
#SSLRandomSeed connect file:/dev/urandom 512

# When we also provide SSL we have to listen to the
# standard HTTP port (see above) and to the HTTPS port
#
# Note: Configurations that use IPv6 but not IPv4-mapped addresses need two
#       Listen directives: "Listen [::]:443" and "Listen 0.0.0.0:443"
#
#Listen 0.0.0.0:443
#Listen [::]:443
Listen 443

##  SSL Global Context
##
##  All SSL configuration in this context applies both to
##  the main server and all SSL-enabled virtual hosts.

<IfModule mime_module>
    #
    #   Some MIME-types for downloading Certificates and CRLs
    #
    AddType application/x-x509-ca-cert .crt
    AddType application/x-pkcs7-crl    .crl
</IfModule>

#   Pass Phrase Dialog:
#   Configure the pass phrase gathering process.
#   The filtering dialog program (`builtin' is a internal
#   terminal dialog) has to provide the pass phrase on stdout.
SSLPassPhraseDialog  builtin

#   Inter-Process Session Cache:
#   Configure the SSL Session Cache: First the mechanism
#   to use and second the expiring timeout (in seconds).
#SSLSessionCache         "dbm:logs/ssl.scache"
##SSLSessionCache        "shmcb:logs/ssl.scache(512000)"
##SSLSessionCacheTimeout  300

#   Semaphore:
#   Configure the path to the mutual exclusion semaphore the
#   SSL engine uses internally for inter-process synchronization.
SSLMutex default

##
## SSL Virtual Host Context
##

<VirtualHost *:443>
    #   General setup for the virtual host
    ## location where your documents are exists
    DocumentRoot "C:/xampp/htdocs/contactwebspace/app2"

    ## server name you used to create you certificate
    ## and make sure a entry in "C:\Windows\System32\drivers\etc\hosts"
## like: 127.0.0.1 pritom.com ## and : 127.0.0.1 www.pritom.com
ServerName pritom.com:443
ServerAlias www.pritom.com:443
ServerAdmin webmaster@localhost
ErrorLog "logs/error-ssl.log"
<IfModule log_config_module>
CustomLog "logs/access-ssl.log" combined
</IfModule>
# SSL Engine Switch:
# Enable/Disable SSL for this virtual host.
SSLEngine on
# SSL Cipher Suite:
# List the ciphers that the client is permitted to negotiate.
# See the mod_ssl documentation for a complete list.
SSLCipherSuite ALL:!ADH:!EXPORT56:RC4+RSA:+HIGH:+MEDIUM:+LOW:+SSLv2:+EXP:+eNULL
# Server Certificate:
# Point SSLCertificateFile at a PEM encoded certificate. If
# the certificate is encrypted, then you will be prompted for a
# pass phrase. Note that a kill -HUP will prompt again. Keep
# in mind that if you have both an RSA and a DSA certificate you
# can configure both in parallel (to also allow the use of DSA
# ciphers, etc.)
#SSLCertificateFile "conf/ssl.crt/server-dsa.crt"
#SSLCertificateFile "conf/ssl.crt/server.crt"
SSLCertificateFile "conf/ssl/cp.cert"
# Server Private Key:
# If the key is not combined with the certificate, use this
# directive to point at the key file. Keep in mind that if
# you've both a RSA and a DSA private key you can configure
# both in parallel (to also allow the use of DSA ciphers, etc.)
#SSLCertificateKeyFile "conf/ssl.key/server-dsa.key"
#SSLCertificateKeyFile "conf/ssl.key/server.key"
SSLCertificateKeyFile "conf/ssl/cp.key"
# Server Certificate Chain:
# Point SSLCertificateChainFile at a file containing the
# concatenation of PEM encoded CA certificates which form the
# certificate chain for the server certificate. Alternatively
# the referenced file can be the same as SSLCertificateFile
# when the CA certificates are directly appended to the server
# certificate for convinience.
#SSLCertificateChainFile "conf/ssl.crt/server-ca.crt"
# Certificate Authority (CA):
# Set the CA certificate verification path where to find CA
# certificates for client authentication or alternatively one
# huge file containing all of them (file must be PEM encoded)
# Note: Inside SSLCACertificatePath you need hash symlinks
# to point to the certificate files. Use the provided
# Makefile to update the hash symlinks after changes.
#SSLCACertificatePath "conf/ssl.crt"
#SSLCACertificateFile "conf/ssl.crt/ca-bundle.crt"
# Certificate Revocation Lists (CRL):
# Set the CA revocation path where to find CA CRLs for client
# authentication or alternatively one huge file containing all
# of them (file must be PEM encoded)
# Note: Inside SSLCARevocationPath you need hash symlinks
# to point to the certificate files. Use the provided
# Makefile to update the hash symlinks after changes.
#SSLCARevocationPath "conf/ssl.crl"
#SSLCARevocationFile "conf/ssl.crl/ca-bundle.crl"
# Client Authentication (Type):
# Client certificate verification type and depth. Types are
# none, optional, require and optional_no_ca. Depth is a
# number which specifies how deeply to verify the certificate
# issuer chain before deciding the certificate is not valid.
#SSLVerifyClient require
#SSLVerifyDepth 10
# Access Control:
# With SSLRequire you can do per-directory access control based
# on arbitrary complex boolean expressions containing server
# variable checks and other lookup directives. The syntax is a
# mixture between C and Perl. See the mod_ssl documentation
# for more details.
#<Location />
#SSLRequire ( %{SSL_CIPHER} !~ m/^(EXP|NULL)/ \
# and %{SSL_CLIENT_S_DN_O} eq "Snake Oil, Ltd." \
# and %{SSL_CLIENT_S_DN_OU} in {"Staff", "CA", "Dev"} \
# and %{TIME_WDAY} >= 1 and %{TIME_WDAY} <= 5 \
# and %{TIME_HOUR} >= 8 and %{TIME_HOUR} <= 20 ) \
# or %{REMOTE_ADDR} =~ m/^192\.76\.162\.[0-9]+$/
#</Location>
# SSL Engine Options:
# Set various options for the SSL engine.
# o FakeBasicAuth:
# Translate the client X.509 into a Basic Authorisation. This means that
# the standard Auth/DBMAuth methods can be used for access control. The
# user name is the `one line' version of the client's X.509 certificate.
# Note that no password is obtained from the user. Every entry in the user
# file needs this password: `xxj31ZMTZzkVA'.
# o ExportCertData:
# This exports two additional environment variables: SSL_CLIENT_CERT and
# SSL_SERVER_CERT. These contain the PEM-encoded certificates of the
# server (always existing) and the client (only existing when client
# authentication is used). This can be used to import the certificates
# into CGI scripts.
# o StdEnvVars:
# This exports the standard SSL/TLS related `SSL_*' environment variables.
# Per default this exportation is switched off for performance reasons,
# because the extraction step is an expensive operation and is usually
# useless for serving static content. So one usually enables the
# exportation for CGI and SSI requests only.
# o StrictRequire:
# This denies access when "SSLRequireSSL" or "SSLRequire" applied even
# under a "Satisfy any" situation, i.e. when it applies access is denied
# and no other module can change it.
# o OptRenegotiate:
# This enables optimized SSL connection renegotiation handling when SSL
# directives are used in per-directory context.
#SSLOptions +FakeBasicAuth +ExportCertData +StrictRequire
<FilesMatch "\.(cgi|shtml|pl|asp|php)$">
SSLOptions +StdEnvVars
</FilesMatch>
<Directory "C:/xampp/cgi-bin">
SSLOptions +StdEnvVars
</Directory>
# SSL Protocol Adjustments:
# The safe and default but still SSL/TLS standard compliant shutdown
# approach is that mod_ssl sends the close notify alert but doesn't wait for
# the close notify alert from client. When you need a different shutdown
# approach you can use one of the following variables:
# o ssl-unclean-shutdown:
# This forces an unclean shutdown when the connection is closed, i.e. no
# SSL close notify alert is send or allowed to received. This violates
# the SSL/TLS standard but is needed for some brain-dead browsers. Use
# this when you receive I/O errors because of the standard approach where
# mod_ssl sends the close notify alert.
# o ssl-accurate-shutdown:
# This forces an accurate shutdown when the connection is closed, i.e. a
# SSL close notify alert is send and mod_ssl waits for the close notify
# alert of the client. This is 100% SSL/TLS standard compliant, but in
# practice often causes hanging connections with brain-dead browsers. Use
# this only for browsers where you know that their SSL implementation
# works correctly.
# Notice: Most problems of broken clients are also related to the HTTP
# keep-alive facility, so you usually additionally want to disable
# keep-alive for those clients, too. Use variable "nokeepalive" for this.
# Similarly, one has to force some clients to use HTTP/1.0 to workaround
# their broken HTTP/1.1 implementation. Use variables "downgrade-1.0" and
# "force-response-1.0" for this.
BrowserMatch ".*MSIE.*" nokeepalive ssl-unclean-shutdown downgrade-1.0 force-response-1.0
# Per-Server Logging:
# The home of a custom SSL log file. Use this when you want a
# compact non-error SSL logfile on a virtual host basis.
CustomLog "logs/ssl_request.log" "%t %h %{SSL_PROTOCOL}x %{SSL_CIPHER}x \"%r\" %b"
</VirtualHost>
</IfModule>
Step 7: If you maintain any virtual host file make sure there are not entry like:
NameVirtualHost *
Make the line seems to be like the following:
NameVirtualHost *:80
If virtual host file contains any block as:
<VirtualHost *>
Change it to:
<VirtualHost *:80>
for support non ssl (port: 80) as http request.
Step 8: Restart your apache server.
Step 10: Hit browser with the following url: https://pritom.com (as you used this web address in your ssl.conf file and has a entry in host file)
Tuesday, July 23, 2013
Create Self-Signed Certificate Windows
At first install OpenSSL in your windows machine.
Several files related to your your SSL certificate will be created in this section, so choose a common base name to use. In my examples I use "
Several files related to your your SSL certificate will be created in this section, so choose a common base name to use. In my examples I use "
blarg", which I've italicised to show it should be replaced by your choice. In practice, I recommend extracting the essence from your domain name; for example, if I was creating a certificate for https://www.neilstuff.com/ then I'd use "neilstuff".
Open up a command prompt and go to the directory where you unzipped OpenSSL and run the following command to create a new certificate request:
openssl req -config openssl.cnf -new -out blarg.csr -keyout blarg.pem
You'll be prompted to answer many questions, which ones depend on your
openssl.cnf file; all except two of these can be left blank:- PEM pass phrase: Password associated with the private key (
blarg.pem) you're generating. Since we'll be removing this for the benefit of Apache 2.0.X, I suggest using something like "none" or "password". - Common Name: The fully-qualified domain name associated with this certificate. In my example, I use
www.blarg.comwhich means I damn well better use that certificate onhttps://www.blarg.com/. For personal security, testing, or intranets it's okay for this to not quite match -- just be prepared to deal with warnings from web browsers and such.
Now it's time to create a non-password protected key for Apache 2.0.X by executing the following:
openssl rsa -in blarg.pem -out blarg.key
The only thing you'll be asked is the password you had used. Your resulting
KEY file is essential the same thing as the PEM, just not password protected.
Before we go on, delete the
.rnd file. This contains entropy information which could be used by malicious people to try and crack your certificate later on (if they get a hold of it).
Finally, run the following command to create an X.509 certificate, e.g. the kind of certificate that SSL likes to munch:
openssl x509 -in blarg.csr -out blarg.cert -req -signkey blarg.key -days 365

Congratulations, you've created a self-signed certificate! Keep the
KEY and CERT files some place safe, we'll be using them soon. Installing OpenSSL on Windows
OpenSSL is officially distributed in C source code format. This is not a problem for Unix systems where C compiler is always available. But if you have a Windows system, you will have a hard time to install OpenSSL in C source code format. What you should do is to find a pre-compiled binary version for Windows. Here is my sugge I installed OpenSSL on my Windows system:
1. Go to http://gnuwin32.sourceforge.net/packages/openssl.htm, and download the "Zip" version.
2. Unzip the file somewhere on your computer.
3. Copy all the
4. Open command line window, and try the following command:
5. You'll also need an
If you see the list of commands printed by OpenSSL, you know that your installation is done correctly.
------------
For other tutorials on OpenSSL, see http://www.herongyang.com/crypto/
1. Go to http://gnuwin32.sourceforge.net/packages/openssl.htm, and download the "Zip" version.
2. Unzip the file somewhere on your computer.
3. Copy all the
libeay32.dll and ssleay32.dll to your Windows\System32 or xampp/php (if you are using xampp server) directory. If you've dealt with SSL at all before, especially as a developer, you might already have copies of these there. Keep whatever is newest. 4. Open command line window, and try the following command:
Code:
>\local\gnuwin32\bin\openssl -help
openssl:Error: '-help' is an invalid command.

Standard commands
asn1parse      ca             ciphers        crl            crl2pkcs7
dgst           dh             dhparam        dsa            dsaparam
enc            engine         errstr         gendh          gendsa
genrsa         nseq           ocsp           passwd         pkcs12
pkcs7          pkcs8          rand           req            rsa
rsautl         s_client       s_server       s_time         sess_id
smime          speed          spkac          verify         version
x509
......
openssl.cnf which is an OpenSSL configuration file that, for some reason, doesn't come with Hunter's distribution. Download this one or this one or this one or this one and save it to the folder where you unzipped OpenSSL.If you see the list of commands printed by OpenSSL, you know that your installation is done correctly.
------------
For other tutorials on OpenSSL, see http://www.herongyang.com/crypto/
__________________
Good tutorials for beginners on PHP, JSP, ASP, SQL, ...
--> http://www.herongyang.com/
Good tutorials for beginners on PHP, JSP, ASP, SQL, ...
--> http://www.herongyang.com/
Subscribe to:
Posts (Atom)