|
Handle click outside of React component | ReactJS Component Detect Click Outside Listener of HTML Element This will be helpful when we need to check click outside event for multiple elements on same component |
| The first thing you need to know is that you can attach and detach mousedown listeners on the document object itself. |
 |
 |
 |
import React, { Component } from "react"; import "./styles.css"; class OutsideClickCheckHandler extends Component { constructor(props) { super(props); this.parent = props.parent; this.tag = props.tag; this.classToCHeck = "outside_click_check_handler_" + ++OutsideClickCheckHandler.counter; this.setWrapperRef = this.setWrapperRef.bind(this); this.handleClickOutside = this.handleClickOutside.bind(this); } componentDidMount() { document.addEventListener("mousedown", this.handleClickOutside); } componentWillUnmount() { document.removeEventListener("mousedown", this.handleClickOutside); } setWrapperRef(node) { this.wrapperRef = node; if (node !== undefined && node !== null) { node.classList.add(this.classToCHeck); } } handleClickOutside(e) { if (!e.target.closest("." + this.classToCHeck)) { this.parent.someOneClickedOutsideMe(this.tag); } } render() { return <div ref={this.setWrapperRef}>{this.props.children}</div>; } } export default OutsideClickCheckHandler; if (OutsideClickCheckHandler.counter === undefined) { OutsideClickCheckHandler.counter = 0; } |
 |
 |
| Full example at CodeSandBox.IO |
Saturday, December 26, 2020
Handle click outside of React component | ReactJS Component Detect Click Outside Listener of HTML Element
Saturday, December 19, 2020
SweetAlert 2 - Option to not focus previous element | Focus another input element rather then previous focused element Swal.fire
| This particular post is to focus any other input rather last focused element/input when sweet alert closed. By default sweet alert focused last focused element when alert closed. |
let _this = {}; Swal.fire({ icon: 'error', title: 'Oops...', text: "Something went wrong", didDestroy: function () { if(_this.isConfirmed) { $("#name").focus(); } } }).then((result) => { _this = result; }); |
Sunday, October 18, 2020
Grails on Groovy - Clear and Flush Current Hibernate Session Data and Evict All Query Cache Data | Clearing Hibernate Query Cache in Grails
|
Hibernate already has support for query cache. And we know that when we perform a big task there are huge number queries remain in our cache factory. And more important that in most cases we don't need this caches so as a result cache factory getting full with unusual cache data.
This could be a performance issue - so it's better we clear cache on our own responsibility after a big task completed. |
| Below are the procedure to flush and clear current session (hibernate session) data so that cache factory have enough space for further execution. |
import org.hibernate.SessionFactory import grails.util.Holders private static SessionFactory _sessionFactory static Boolean flushAndClearCache() { try { sessionFactory.currentSession.flush() sessionFactory.currentSession.clear() sessionFactory.getCache().evictEntityRegions() sessionFactory.getCache().evictCollectionRegions() sessionFactory.getCache().evictDefaultQueryRegion() sessionFactory.getCache().evictQueryRegions() return true } catch (Throwable ex) { log.error(ex.ex) return false } } static <T> T getBean(Class<T> requiredType) { try { return Holders.applicationContext.getBean(requiredType) } catch (Throwable e) { return null } } static SessionFactory getSessionFactory() { _sessionFactory = _sessionFactory ?: (_sessionFactory = getBean(SessionFactory)) } |
Sunday, July 12, 2020
How to remove build files before another new build start on Laravel-Mix Webpack config file | Delete unused laravel chunk files | Clean dist folder before generating a new build - Laravel with ReactJS
| Since we generate lot of builds with different hashed filenames, it is a good practice to delete the dist directory before running each build. |
| In laravel-mix webpack.mix.js is the configuration file we used for reactjs webpack configuration. What we have to do write some code to webpack.mix.js (located in based directory of project in my case) |
const mix = require('laravel-mix'); const date = (new Date()).getTime(); const fs = require('fs'); const buildDir = './public/js/chunk/'; fs.readdir(path.resolve(buildDir), (err, files) => { if (err) { console.log(err); } else { files.forEach(function (file) { fs.unlink(path.resolve(buildDir + file), function () { console.log(buildDir + file + ' - deleted'); }); }); } }); /* |-------------------------------------------------------------------------- | Mix Asset Management |-------------------------------------------------------------------------- | | Mix provides a clean, fluent API for defining some Webpack build steps | for your Laravel application. By default, we are compiling the Sass | file for the application as well as bundling up all the JS files. | */ mix.react('resources/js/app.js', 'public/js') .sass('resources/sass/app.scss', 'public/css'); mix.webpackConfig({ output: { // Directory for junk files to {ROOT_DIR}/public/js chunkFilename: 'js/chunk/[name]-' + date + '.js' }, }); |
Thursday, April 30, 2020
How to save Username and Password in GIT Bash
|
First Run Below Command From GIT Bash (Remove --global if you want to save credentials for current project only)
|
Now run below command and provide username/password (which will be remembered)
|
| Provide a username and password and those details will then be remembered later. The credentials are stored in a file on the disk, with the disk permissions of "just user readable/writable" but still in plaintext. |
Friday, April 17, 2020
Firebase Authentication for Web - Sign-in Method Email/Password Implementation
First go to https://firebase.google.com/docs/web/setup and create a project step by step by following https://console.firebase.google.com/.
 |
|
Step 2: Register your app with Firebase Go to https://console.firebase.google.com/u/0/project/test-firebase-auth-1/authentication/providers for enable signin method. I enabled Email/Password authentication type for this example.  |
|
To initialize Firebase in your app, you need to provide your app's Firebase project configuration. Go to Project Settings page for configure app and get API Key.   |
Step 3: Add Firebase SDKs and initialize Firebase, we will use CDN to load all necessary resources <script src="//www.gstatic.com/firebasejs/7.14.0/firebase-app.js"></script> <script src="//www.gstatic.com/firebasejs/7.8.1/firebase-auth.js"></script> <script type="text/javascript"> $(document).ready(function () { // Your web app's Firebase configuration var firebaseConfig = { apiKey: "AIzaSyA9XqTsdfsdfsdf0w9TSlYSlUlpCLcNjeM", authDomain: "test-firebase-auth-1.firebaseapp.com", databaseURL: "https://test-firebase-auth-1.firebaseio.com", projectId: "test-firebase-auth-1", storageBucket: "test-firebase-auth-1.appspot.com", messagingSenderId: "514502059460", appId: "1:51450324232059460:web:70b12cd2342345ee4287f932f091" }; // Initialize Firebase var defaultProject = firebase.initializeApp(firebaseConfig); console.log(defaultProject.auth()); }); </script> |
|
You can restrict your API Key to specific domain using below steps: 1. Visit https://console.developers.google.com/apis 2. Go to your firebase project 3. Go to Credentials 4. Under API keys, select the Browser key associated with your firebase project (should have the same key as the API key you use to initialize your firebase app.) 5. Under "Accept requests from these HTTP referrers (web sites), simply add the URL of your app.  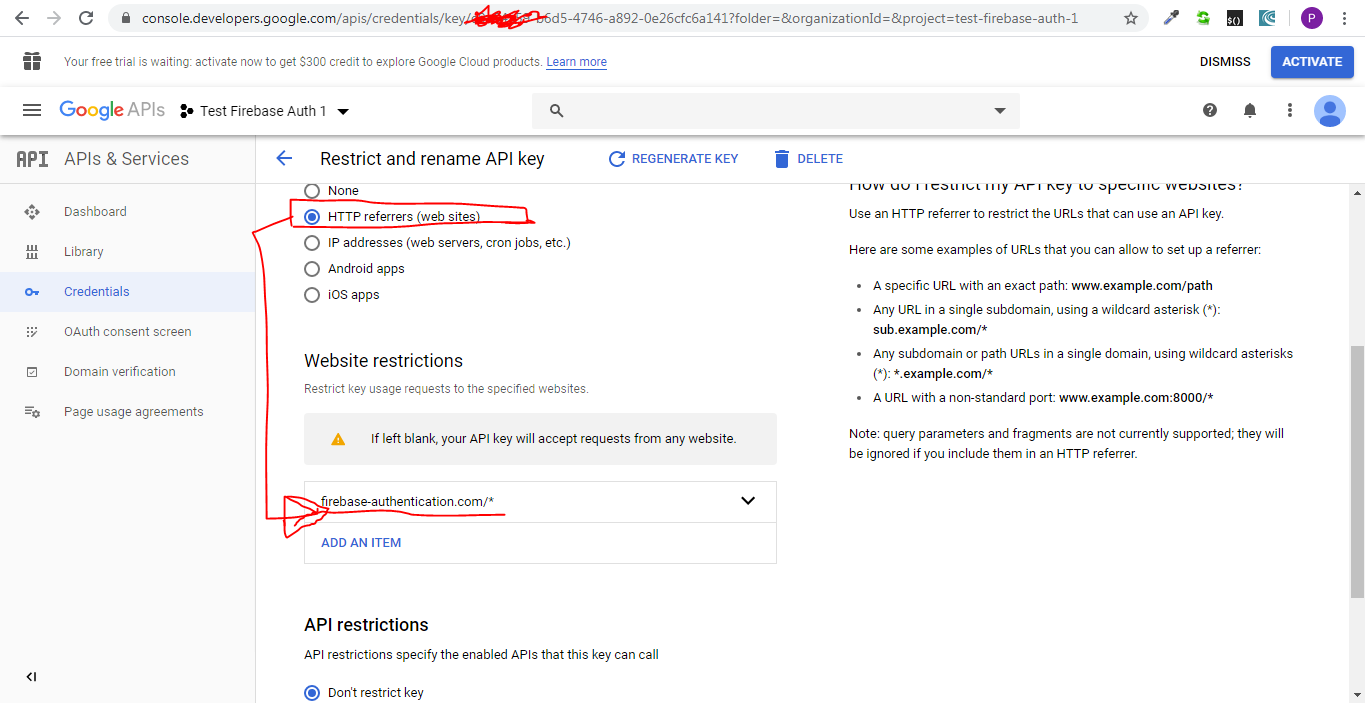 |
|
We are done from configure Firebase. Now we will build our registration/login page. |
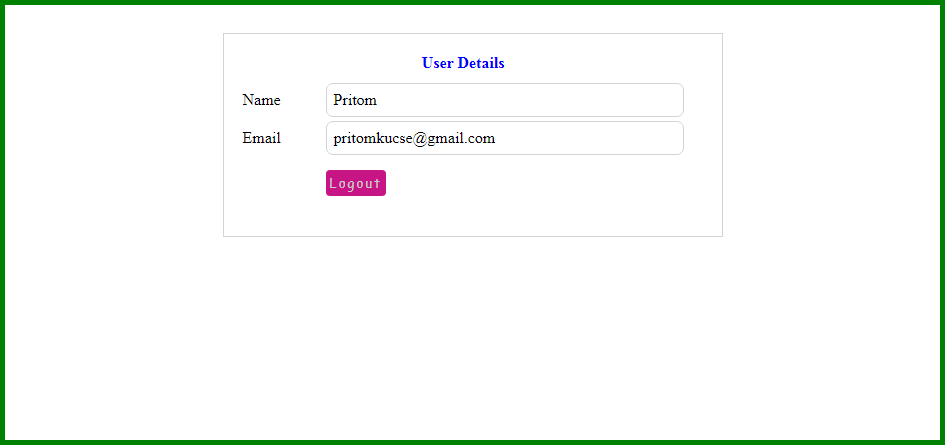
Request Sample When User State Changed (Login,Logout,Registration)defaultProject.auth().onAuthStateChanged(function(user) { if (user) { console.log("Logged in user details"); console.log(user); console.log(user.displayName); console.log(user.email); } else { window.location.href = "/"; } }); |
Request Sample to Register User With Email/PassworddefaultProject.auth().createUserWithEmailAndPassword(email, password).catch(function(error) { console.log(error); if (error.message) { alert(error.message); } }); |
Request Sample to Login ActiondefaultProject.auth().signInWithEmailAndPassword(email, password).catch(function(error) { console.log(error); if (error.message) { alert(error.message); } }); |
Password Reset Email Send RequestdefaultProject.auth().sendPasswordResetEmail(email).then(function() { alert('Password Reset Email Sent!'); }).catch(function(error) { console.log(error); if (error.message) { alert(error.message); } }); You can configure password reset URL  |
You can reset your password using below code snippetconst queryString = window.location.search; const urlParams = new URLSearchParams(queryString); const code = urlParams.get('oobCode'); defaultProject.auth().confirmPasswordReset(code, "Password-123456").then(function() { alert('Password Reset Completed'); }).catch(function(error) { console.log(error); if (error.message) { alert(error.message); } }); |
Finally GibHUB link to the sample project
     |
Saturday, March 14, 2020
Laravel-mix Webpack Public Path | Set custom path for chunk files | Using Laravel Mix with webpack for All Your Assets
| Laravel Mix allows you to use a single line to describe what you want and it'll use it's preconfigured settings to process it properly. |
| Most of our time will be spent in the webpack.mix.js file. In the file, we can configure all we need to do to set public path and we can also set js file location for chunk js files when we use Suspense and lazy for dynamic js loading for per route. |
| There are several more Mix methods and you can set all of them in the default webpack.mix.js file. |
// Full API
    // mix.js(src, output);
    // mix.react(src, output); <-- Identical to mix.js(), but registers React Babel compilation.
    // mix.extract(vendorLibs);
    // mix.sass(src, output);
    // mix.standaloneSass('src', output); <-- Faster, but isolated from Webpack.
    // mix.fastSass('src', output); <-- Alias for mix.standaloneSass().
    // mix.less(src, output);
    // mix.stylus(src, output);
    // mix.postCss(src, output, [require('postcss-some-plugin')()]);
    // mix.browserSync('my-site.dev');
    // mix.combine(files, destination);
    // mix.babel(files, destination); <-- Identical to mix.combine(), but also includes Babel compilation.
    // mix.copy(from, to);
    // mix.copyDirectory(fromDir, toDir);
    // mix.minify(file);
    // mix.sourceMaps(); // Enable sourcemaps
    // mix.version(); // Enable versioning.
    // mix.disableNotifications();
    // mix.setPublicPath('path/to/public');
    // mix.setResourceRoot('prefix/for/resource/locators');
    // mix.autoload({}); <-- Will be passed to Webpack's ProvidePlugin.
    // mix.webpackConfig({}); <-- Override webpack.config.js, without editing the file directly.
    // mix.then(function () {}) <-- Will be triggered each time Webpack finishes building.
    // mix.options({
    //   extractVueStyles: false, // Extract .vue component styling to file, rather than inline.
    //   processCssUrls: true, // Process/optimize relative stylesheet url()'s. Set to false, if you don't want them touched.
    //   purifyCss: false, // Remove unused CSS selectors.
    //   uglify: {}, // Uglify-specific options. https://webpack.github.io/docs/list-of-plugins.html#uglifyjsplugin
    //   postCss: [] // Post-CSS options: https://github.com/postcss/postcss/blob/master/docs/plugins.md
    // });
|
| Below is the code snippet which will define js file location for chunk js files: |
const mix = require('laravel-mix'); /* |-------------------------------------------------------------------------- | Mix Asset Management |-------------------------------------------------------------------------- | | Mix provides a clean, fluent API for defining some Webpack build steps | for your Laravel application. By default, we are compiling the Sass | file for the application as well as bundling up all the JS files. | */ mix.react('resources/js/app.js', 'public/js') .sass('resources/sass/app.scss', 'public/css'); mix.webpackConfig({ output: { // Directory for junk files to {ROOT_DIR}/public/js chunkFilename: 'js/[name].js', }, }); |
Subscribe to:
Posts (Atom)